How To Get Your Pre-Pregnancy Body Back

I’ve been writing this for a few weeks and I have so many friends right now that are pregnant and having babies that I wanted to share my experiences! It is so

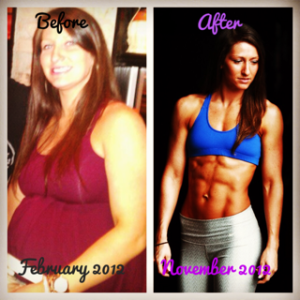
8 Month Transformation (after first pregnancy)

8 Month Transformation (after first pregnancy)

wonderful to see all the happy news going around as we have reached that time in our lives that we are starting families. 🙂

There are so many wonderful things that come with pregnancy and to witness first hand how amazing the human body is, is truly a gift! The physical and hormonal changes your body goes through during pregnancy are exciting, interesting, exhausting, stressful and mind boggling all at the same time! Post-pregnancy is also an emotional time. While you have this precious baby that you have been waiting to meet for what seems like an eternity, you are also left with this strange, squishy post-pregnant body that you don’t recognize. No you are not ruined and stretch marks fade with time (while creams help keep your skin hydrated and nourished, stretch marks are mostly genetic). You just need to accept the fact that it is going to take more than a month and some honest work to get your pre-pregnancy body back. But you definitely CAN get it back and you WILL.

Since I now have two beautiful, healthy babies and have been through two “post-pregnancy bodies” I wanted to share some things I have done to get back to normal. Now, my way is certainly not the only way and there are plenty of women who have gotten in shape faster than I have, but this is a healthy and stress free road I have taken that I hope can help you.

First, it IS easier said than done, but PLEASE, don’t hate on your post-pregnancy body. Realize how much you have just gone through. Your body has gone through A LOT over the past 40 (or so) weeks, not to mention the trauma of child birth. Give yourself proper rest, proper nutrition and fluid intake immediately after child birth.  I will admit, after my second baby I started trying to exercise too quickly, and along with taking care of my 27 pound toddler, I hurt my back. Your core has been stretched and practically torn in half,putting a lot of stress on your back muscles, it needs plenty of time to heal and gain strength. The first thing I did (before being cleared to exercise) was something very simple called the “stomach vacuum”. You can do this while nursing, showering, eating dinner, etc. Simply suck your stomach in, pulling your belly button in towards your spine, and holding that for as long as you can. Imagine your stomach muscles contracting and your belly flattening while you do this. Initially, you probably won’t even be able to feel your stomach muscles but this simple exercise will start to initiate the activation of the transverse abdominus (deepest muscle of your abdominals acting as a girdle) and will start pulling the muscles of your core back together. So Simple.

Once you have been cleared (by your doctor) to exercise, start slowly. Don’t kill yourself your first workout. It is totally normal to feel weak and fatigued after a few exercises. After all you have probably not yet had more than a 4 hour chunk of sleep. Start with a 20-minute yoga DVD or a few upper body and lower body exercises with very light dumbbells or just your bodyweight. Low planks, side planks and prone back extensions are your BEST FRIENDS right now. You can do these at home while the baby naps. Start out with a 20 second low plank, 10 seconds on each side plank and 12 repetitions of prone back extensions for 3 rounds. I do these exercises 3-4 times per week and my stomach has flattened out, my linea negra is starting to disappear and I have had a significant decrease in low back pain.

plank

Low Plank

sideplank

Side Plank

proneback

Prone Back Extension


Second, eat nutritious foods! I sometimes forget to eat because I have a 20-month old and I am nursing a 3-month old, but I do my best to eat as nutritiously as possible! I am not going low-carb, counting calories or cutting out any specific foods (unless it makes my 3-month old gassy LOL). I eat protein at every meal, a clean complex-carbohydrate and I avoid processed foods. When it’s a really crazy day I snack on protein muffins or some leftovers. I DO have a “FREE MEAL” at least once on the weekends which is usually pizza (and more than one slice LOL). I mean, come on, you’ve got to live a little, right? This is usually on a saturday night when both babies are asleep and we are watching the FSU game. ;).

One great piece of advice I got when I was pregnant with my first was to get a postpartum belly band (I got mine for only $16 on Amazon). This saved my lower back! It will give your back great support and with help you to keep your abdominal muscles pulled in. Get one if you haven’t already!

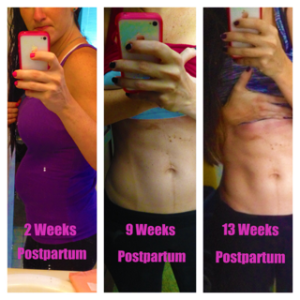
I always tell my clients to give themselves at least 3 months to start noticing a big change in their bodies when they start a new exercise program. Below are my pictures from 2 weeks postpartum and 13 weeks postpartum (I was cheating a bit in my before picture because I was wearing my postpartum belly band). The biggest help for me was being in shape pre-pregnancy. I honestly was not one of those super active pregnant women during either of my pregnancies. I tried to exercise regularly but I didn’t have the energy or motivation and my daughter was measuring smaller than normal so I stopped working out completely around 30 weeks pregnant and started eating MORE.

send from InstaText(Free iPhone_iPad App) (9)

Current Transformation (after second pregnancy).

So when you are ready and cleared to start exercise, ease into it. Start with bodyweight exercises, core strengthening exercises and light yoga or pilates. Work your strength back up and start hitting the free weights and machines. I have done maybe three steady state cardio sessions since my daughter was born. I focus on strength training because it is the only exercise that is going to SHAPE my body into what I want it to look like. Most importantly, I’ve gotten a lot of strength back in my abdominals and lower abs without doing a single crunch. Remember, start with low planks, side planks and prone back extensions and then try this routine; it’s great for burning fat and increasing core strength post pregnancy. I will be posting more workouts in the future so stay tuned. 🙂

*If you have any questions or you would like to share YOUR advice for how you got back into shape post-pregnancy PLEASE share your comments below! I look forward to hearing from you!
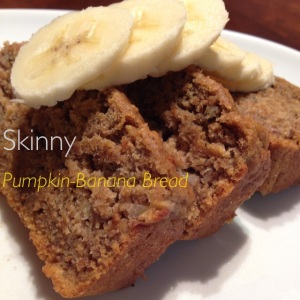
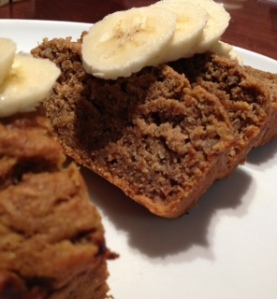
Skinny Pumpkin-Banana Bread

photo (7)This bread is sooo good and and totally worth the THREE failed attempts at making it perfect! Over the last few weeks I’ve discovered that banana literally goes with EVERYTHING! It goes great with pumpkin, coconut, raspberries, blueberries, chocolate, peanut butter, you name it! And despite it’s relatively high sugar (fructose) content, I like to use it in muffins, breads and protein shakes that I’ll enjoy pre and/or post-workout. WHY? I’m glad you asked!

Studies show a greater increase in muscle hypertrophy (growth) and strength when taking in protein and carbohydrates pre and post workout than simply following a general meal timing schedule. So make sure when you are working hard at the gym you ALWAYS replenish your muscles with a good quality protein and carbohydrate source immediately after! A good example of something I would eat post-workout would be a whey protein shake and 2 small slices of this pumpkin banana bread. So get to baking! 🙂

Ingredients:

2 cups oat flour (simply blend about 2 1/2 cups old fashioned oats)
1 cup Stevia in the Raw
1 cup pure pumpkin puree
1/2 cup unsweetened almond milk
1/2 cup coconut oil, melted
2 medium ripe bananas, mashed
1 tsp baking soda
1/4 tsp baking powder
1/4 tsp sea salt
1 tsp nutmeg
1/2 tsp cinnamon
1 tsp vanilla extract

Directions:

1.) Preheat oven to 350 degrees. Combine all dry ingredients in a mixing bowl and set aside.

2.) Next, combine all wet ingredients (except coconut oil) and mix with a fork or whisk until smooth.

3.) Add wet mixture to the dry mixture and stir until there are no longer any dryphoto (8) clumps.

4.) Add melted coconut oil and stir well.

5.) Pour batter into a lightly greased loaf pan, about 1/2-3/4 ways full. *You will have enough batter to make about 8 regular sized muffins or another small loaf of bread.

6.) Bake at 350 degrees for about 40-45 minutes. Check that the center is firm before removing from the oven. *If you are making this recipe into muffins, the baking time will be around 15-20 minutes.

*Makes 2 loaves or about 18 regular sized muffins.

Nutrition Facts:

Calories: 112
Total Fat: 6.9 g
Total Carbohydrates: 11.4 g
Total Protein: 2 g

Twelve Days of Xmas: Peppermint Brownie Bites

It’s my new blogging project, “12 Days of Christmas Recipes”, healthy recipes of course! So I’ve seen this idea on other websites, blogs, etc. This is my version. Twelve recipes that are healthy and fun Holiday dishes and treats that you can enjoy at home or bring to Holiday parties. Fun, right?!peppermint

Did you know that studies show most people never lose the weight they gain during the Holidays? That’s pretty scary because even if you only gain one pound (the average American) by the time you’re in your 40’s or 50’s you’re battling an excess of at least 30 pounds. YIKES! (The New England Journal of Medicine).

While I am not a proponent of depriving yourself of your favorite foods on occasion, I do feel it’s very important to be careful with getting carried away with excess calories just because it’s Thanksgiving, Christmas, Hanukkah, etc. I’ve certainly had days where I’ve indulged a little beyond what I wanted to just because I was at a Holiday party and I felt like I wanted a little bit of everything. 🙂

*Try and have a goal of eating a salad before your Holiday dinners and alternating one glass of water with each alcoholic beverage, we all know there’s tons of hidden calories in drinks! Also, try small bites of desserts, don’t take one serving of each dish! That should get you through the Holidays feeling FIT, festive and satisfied.

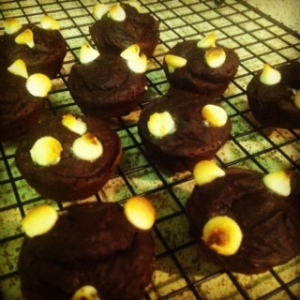
This is my first “12 Days of Christmas” recipe, high protein, Skinny Peppermint Brownie Bites!  

Ingredients:

3 scoops (about 2/3 cup) Chocolate protein powder (can sub equal parts healthy baking powder as well)
2 Tablespoons whole wheat pastry flour OR oat flour
1/2 cup + 2 Tablespoons pumpkin puree (NOT pumpkin pie mix)
1/2 cup unsweetened cocoa powder
1/2 cup Stevia in the Raw
1/4 cup fat-free Greek yogurt
1/4 cup organic white chocolate chips
2 egg whites
2 Tablespoons coconut oil, melted
1/2 teaspoon baking powder
1/8 teaspoon peppermint extract

Directions

1.) Preheat oven to 350 degrees.

2.) In a mixing bowl combine protein powder, whole wheat flour, stevia, cocoa powder and baking powder. Stir until blended.

3.) In the same bowl add the wet ingredients. Pumpkin puree, egg whites, Greek yogurt, melted coconut oil and peppermint extract. Stir until completely blended.

4.) Lightly spray 2 mini muffins tins, add the batter. Drop a few white chocolate chips into each brownie bite, I used about 4 in each. Use a fork to press the chips down into the batter so you get some in each bite.

5.) Cook for 10-12 minutes. Let cool for 15 minutes.

*Makes 24 brownie bites.

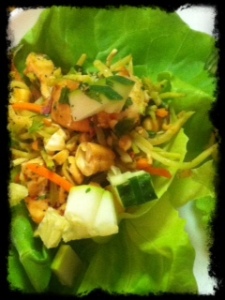
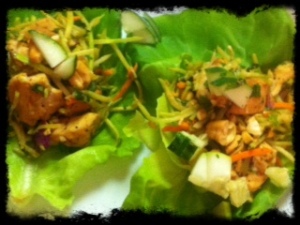
Cashew Chicken Lettuce Wraps

I LOVE the lettuce wraps that they serve at P.F. Changs. They are seriously AMAZING, but also a little on the

Cashew Chicken Lettuce Wraps

fattening side for what is considered a “healthy” dish. An order of P.F. Changs chicken lettuce wraps will give you 530 calories and 24 grams of fat. An order of P.F. Change vegetarian lettuce wraps will give you a whopping 610 calories and 36 grams of fat. Which is surprising, you’d think the vegetarian version would get you less calories and fat, not MORE!

This is a great recipe that is full of veggies and very low in fat. The only fats I add to the entire recipe is 1/4 cup chopped cashews (189 calories and 15 grams of fat). The flavor in this dish comes from fresh herbs and spices. The cashews and chopped cucumber give these lettuce wraps a really nice crunch while the red pepper gives them a nice, spicy kick!

These are especially great to make when you want to have a fun and creative dinner while still watching your carbohydrate intake. This is one of my favorite Friday night dishes!

Ingredients:
1 lb. thinly sliced chicken breast cutlets
1 bag broccoli slaw
1 head butter bib lettuce
1/4 cup cashews, chopped
1/4 cup cucumber, chopped
1/4 cup green onion, chopped
4 TBSP low-sodium soy sauce
2 TBSP fresh cilantro, chopped
2 TBSP crushed red pepper (use less if you don’t want them too spicy!)
1 TBSP dijon mustard
1/2 teaspoon apple cider vinegar
1-2 garlic cloves, chopped
Light cooking spray

Healthy, Low Carb Dinner!

Directions:

1.) Cut thinly sliced chicken breasts into small cubes. Toss in 2 TBSP of low sodium soy sauce, 2 TBSP crushed red pepper and salt & pepper to taste. Bake at 350 degrees for 15-20 minutes or until thoroughly cooked.

2.) Spray a large saucepan with light cooking spray and sautee chopped garlic and green onion for about 2 minutes.

3.) Add broccoli slaw, cook for about 5 minutes until it begins to soften. I cover it with a lid sometimes to quicken the process.

4.) Add in chicken and chopped cashews, stir until well mixed.

5.) In a small mixing bowl, combine 2 TBSP soy sauce, dijon mustard and apple cider vinegar. Wisk until completely incorporated. Pour over top of the broccoli slaw and stir until all the ingredients are coated with the sauce.

6.) Remove broccoli slaw mixture from heat and place in a large serving bowl. Top with freshly chopped cilantro and cucumber. Add salt & pepper to taste.

7.) Separate butter bib lettuce into leaves and place one on top of the other on a serving dish. Serve and ENJOY! 🙂

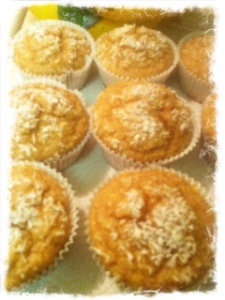
Banana-Coconut Protein Cupcakes

Healthy Cupcakes

I debated on whether to call these “cupcakes” or “muffins”, but these are sooo moist and fluffy that “muffin” just doesn’t do them justice!

I love coconut and banana and I found a reduced-fat shredded coconut at Whole Foods that I’ve been dying to bake with so, voila! Banana-Coconut Protein Cupcakes! You could even use this recipe and throw a home made, low-fat cream cheese icing on it and bring it to a work lunch in, friends house, or birthday party and NO ONE would know they are made with protein powderGreek yogurt and applesauce instead of fattening vegetable oil and sugar!

Basically, you have a yummy little cupcake loaded with lean protein, natural sugars and fiber. Give ’em a try! 🙂

Ingredients:
 1 1/4 cup oat flour (I blend old-fashioned oats in the blender)
4 scoops (about 3/4 cup) vanilla whey protein *I used Prograde in this recipe
1/2 cup stevia *I like to bake with Stevia in the Raw
1 1/4 cup fat-free plain Greek yogurt
3/4 cup unsweetened applesauce 
3 egg whites
3 tablespoons reduced-fat, unsweetened shredded coconut *You could used sweetened but the nutrition facts would change. 🙂
2 Tablespoons banana extract
1/2 tablespoon ground cinnamon
2 teaspoons baking powder
1 teaspoon baking soda
1/4 teaspoon salt

Directions:

1.) Combine all dry ingredients, except coconut,  in a large mixing bowl. Mix until completely incorporated.

2.) In a separate bowl, combine the wet ingredients, and mix until completely incorporated.

3.) Add the wet mixture to the dry ingredients and mix until the batter is free of lumps.

4.) Gently fold in 3 tablespoons of shredded coconut.

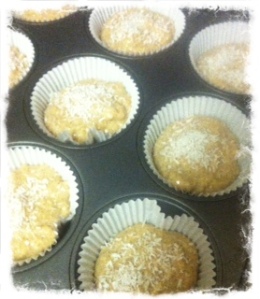
4.) Lightly grease muffin tins with a light cooking spray (this batch will make 15 cupcakes).

5.) Fill each tin about 3/4 cup full. *Note: I used muffin liners with this recipe because I ran out of cooking spray and noticed that they stuck to the paper, I would advise not using liners.

6.) Sprinkle about 1/4 teaspoon of extra shredded coconut on top of each cupcake (this is optional). *The cupcakes have more of a banana taste so I was trying to get a little more coconut flavor.

7.) Bake at 350 degrees for 18-20 minutes. Be careful not to cook them or they will dry out.

*Makes 15 cupcakes.

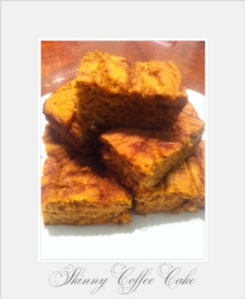
Pumpkin Coffee Cake

One of my favorite things is relaxing with a nice cup of coffee. I probably drink more than I should sometimes but it makes me happy so I’m going to keep drinking the delicious-ness!

So I whipped up this little recipe and gave it a “cinnamon swirl” topping to go along with my morning/afternoon or evening coffee. 🙂 Enjoy!

Ingredients (Cake):

  • 1 1/4 cups oat flour
  • 1/4 cup Almond Meal
  • 1 scoop vanilla protein powder
  • 1 cup unsweetened pumpkin puree
  • 1/2 cup fat-free plain Greek yogurt
  • 1/2 cup unsweetened applesauce
  • 3 egg whites
  • 4 Tablespoons Truvia natural sweetener
  • 1 teaspoon baking soda
  • 2 teaspoons baking powder
  • 1 teaspoon maple extract
  • 1 Tablespoon pumpkin pie spice
  • Ingredients (cinnamon swirl):
  • 2 teaspoons coconut oil
  • 1/2 teaspoon cinnamon
  • 1/2 teaspoon honey

Directions:

In a large mixing bowl, combine your choice of flour, protein powder, Truvia (or stevia), baking soda, baking powder, and pie spice. Mix until completely combined. Add the rest of the ingredients (wet) to the mixture and mix until smooth. Lightly spray an 8X8 or 9X9 inch baking dish. Pour in batter and smooth the top with the back of a spatula.

In a very small side dish combine room temperature coconut oil, cinnamon and honey.Wisk until completely incorporated. Drizzle a couple small spoonfuls of the mixture over the top of the batter (*I only used about half of the “swirl” topping that I made). Use a knife  to create a “swirl” pattern (this reminds me of those delicious, but very fattening cheesecake brownies I used to make from a box when I was little).

Bake at 350 degrees for about 25 minutes. Let cool for about 20 minutes and ENJOY your guilt-free coffee cake!